今回はFragmentでのサンプルアプリです。
Buttonを3つ使ったものです。
fragment_blank.xml
<RelativeLayout xmlns:android="http://schemas.android.com/apk/res/android"
    xmlns:tools="http://schemas.android.com/tools"
    android:layout_width="match_parent"
    android:layout_height="match_parent">

    <Button
        android:id="@+id/button1"
        android:layout_width="match_parent"
        android:layout_height="wrap_content"
        android:layout_centerHorizontal="true"
        android:text="ボタン1" />

    <Button
        android:id="@+id/button2"
        android:layout_width="match_parent"
        android:layout_height="wrap_content"
        android:layout_below="@+id/button1"
        android:layout_centerHorizontal="true"
        android:text="ボタン2" />

    <Button
        android:id="@+id/button3"
        android:layout_width="match_parent"
        android:layout_height="wrap_content"
        android:layout_below="@+id/button2"
        android:layout_centerHorizontal="true"
        android:textColor="@android:color/black"
        android:text="ボタン3" />


</RelativeLayout>
BlankFragment.java
public class BlankFragment extends Fragment {
    @BindView(R.id.button1)Button button1;
    @BindView(R.id.button2)Button button2;
    @BindView(R.id.button3)Button button3;

    @BindColor(R.color.green)int greenColor;
    @BindColor(R.color.blue)int blueColor;
    @BindColor(R.color.yellow)int yellowColor;

    public BlankFragment() {
        // Required empty public constructor
    }

    @Override
    public void onCreate(Bundle savedInstanceState) {
        super.onCreate(savedInstanceState);
    }

    @Override
    public View onCreateView(LayoutInflater inflater,
                             ViewGroup container,
                             Bundle savedInstanceState) {
        View view = inflater.inflate(
                        R.layout.fragment_blank, container, false);
        ButterKnife.bind(this, view);

        button1.setBackgroundColor(greenColor);
        button2.setBackgroundColor(blueColor);
        button3.setBackgroundColor(yellowColor);

        return view;
    }

    @OnClick({R.id.button1, R.id.button2, R.id.button3})
    public void buttonClick(Button button) {
        if(button == button1) {
            Toast.makeText(getContext(),
                "ボタン1をクリック", Toast.LENGTH_SHORT).show();
        } else if (button == button2){
            Toast.makeText(getContext(),
                "ボタン2をクリック", Toast.LENGTH_SHORT).show();
        } else if(button == button3) {
            Toast.makeText(getContext(),
                "ボタン3をクリック", Toast.LENGTH_SHORT).show();
        }
    }

}
FragmentでButterKnifeを使う場合は、ButterKnife.bind(this, view);
で初期設定します。
@BindColor:color.xmlで設定したIDを設定します。
@OnClick({R.id.button1, R.id.button2, R.id.button3}):OnClickListenerを使う時に使用します。
今回のコードは複数Buttonですが、単一Buttonだと、
@OnClick(R.id.button1)という書き方になります。
かなり便利ですね。
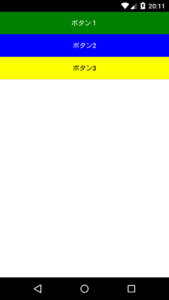
サンプルのスクリーンショットです。
前回と同じですが、すべてButterKnifeに書き換えました。

以上です。