今までは、あまり気にもしていなかったのですが、
ButterKnifeに少し興味があったので、使ってみました。
このサンプルは、TextViewとImageViewを使って文字の大きさ、表示する文字、画像表示、クリック処理をButterKnifeで書いていきます。
Git:
https://github.com/JakeWharton/butterknife
まずは、導入から
build.gradle(Module.app)
apply plugin: 'com.android.application'
apply plugin: 'com.jakewharton.butterknife'

android {
    ...
    }
    buildTypes {
       ...
    }
}

dependencies {
    ...
    compile 'com.jakewharton:butterknife:8.6.0'
    annotationProcessor 'com.jakewharton:butterknife-compiler:8.6.0'
}
apply plugin: ‘com.android.library’①
apply plugin: ‘com.jakewharton.butterknife’②
Gitの説明文では、上記2つを追加と書かれていますが、
②の行のみにしてください。
build.gradle(Project)
ここは下記行を追加するだけです。
buildscript {
    ...
    dependencies {
        classpath 'com.android.tools.build:gradle:2.3.1'
        classpath 'com.jakewharton:butterknife-gradle-plugin:8.6.0'
    }
}
activity_main.xml
<RelativeLayout android:id="@+id/main_layout"
    xmlns:android="http://schemas.android.com/apk/res/android"
    xmlns:tools="http://schemas.android.com/tools"
    xmlns:app="http://schemas.android.com/apk/res-auto"
    android:layout_width="match_parent"
    android:layout_height="match_parent"
    android:background="@android:color/white">

    <TextView
        android:id="@+id/text_view"
        android:layout_width="wrap_content"
        android:layout_height="wrap_content"
        app:layout_constraintBottom_toBottomOf="parent"
        app:layout_constraintLeft_toLeftOf="parent"
        app:layout_constraintRight_toRightOf="parent"
        app:layout_constraintTop_toTopOf="parent"
        android:textColor="@android:color/black"/>

    <ImageView
        android:id="@+id/image_view"
        android:layout_width="wrap_content"
        android:layout_height="wrap_content"
        android:layout_centerInParent="true"
        />

</RelativeLayout>
MainActivity.java
    @BindView(R.id.text_view)TextView textView;
    @BindView(R.id.image_view)ImageView imageView;

    @BindString(R.string.text)String text;
    @BindDimen(R.dimen.textSize)float textSize;
    @BindDrawable(R.drawable.ic_launcher)Drawable drawable;

    @Override
    protected void onCreate(Bundle savedInstanceState) {
        super.onCreate(savedInstanceState);
        setContentView(R.layout.activity_main);

        ButterKnife.bind(this);

        textView.setText(text);
        textView.setTextSize(textSize);
        imageView.setImageDrawable(drawable);
    }

    @OnClick(R.id.image_view)
    public void ImageClick() {
        Intent intent = new Intent(MainActivity.this, Main2Activity.class);
        startActivity(intent);
    }
@BindView: Layoutで設定したIDを設定します。
@BindString: strings.xmlのIDを設定します。
@BindDimen: dimens.xmlのIDを設定します。
@BindDrawable: drawableのIDを設定します。
ButterKnife.bind(this);
上記コードは初期化の際に必ず呼びます。
@OnClick: Click処理をするIDを設定します。
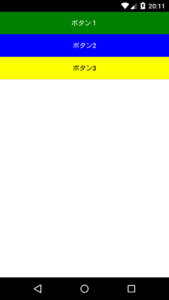
サンプルのスクリーンショットです。

Androidのアイコンを押すと下の画像に遷移します。
次は、FragmentでButterKnifeを使ってみようと思います。
以上です。