この記事は画像サイズを縮小する2つの方法を紹介します。
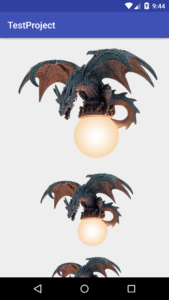
1:画像の幅、高さを指定して表示
使用した画像サイズは、1920×1642です。
 try {
    InputStream is = getResources().getAssets().open("dragon.png");
    ImageView imageView = new ImageView(this);

    BitmapFactory.Options imageOptions = new BitmapFactory.Options();

    Bitmap bitmap = BitmapFactory.decodeStream(is);
    bitmap = Bitmap.createScaledBitmap(bitmap, 480, 410, true);

    imageView.setImageBitmap(bitmap);
    mainLayout.addView(imageView);
    is.close();
 } catch (IOException e) {
    Toast.makeText(this, "Error", Toast.LENGTH_SHORT);
 }
bitmap = Bitmap.createScaledBitmap(bitmap, 480, 410, true);
上記コードで、480×410に変更しています。
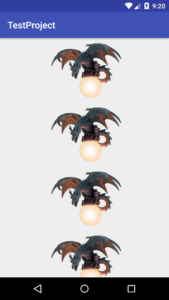
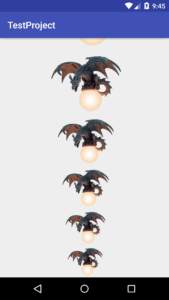
2:画像の縮小率を指定して表示
画像を7枚表示します。
その1枚1枚縮小率を変更するコードです。
 try {
    int scaleDownRate = 2;

    for(int i=0; i<=6; ++i) {
        InputStream is = getResources().getAssets().open("dragon.png");
        ImageView imageView = new ImageView(this);
        BitmapFactory.Options imageOptions = new BitmapFactory.Options();

        imageOptions.inSampleSize = scaleDownRate;
        scaleDownRate++;

        Bitmap bitmap = BitmapFactory.decodeStream(is, null, imageOptions);

        imageView.setImageBitmap(bitmap);
        mainLayout.addView(imageView);
        is.close();
    }
 } catch (IOException e) {
    Toast.makeText(this, "Error", Toast.LENGTH_SHORT);
 }
imageOptions.inSampleSize = scaleDownRate;
上記コードで、比率の変更ができます。
値を10にすると10分の1の画像を作成できます。
以上です。