WebViewサンプルアプリの続きです。
まず、前回のツールバーが邪魔なので消します。
AndroidManifest.xml
AndroidManifestのstyleをTheme.AppCompat.NoActionBarに変更します。
<manifest xmlns:android="http://schemas.android.com/apk/res/android"
    ....>

    <uses-permission android:name="android.permission.INTERNET"/>

    <application
        ....
        android:theme="@style/Theme.AppCompat.NoActionBar">
    ....
</manifest>
activity_main.xml
これで、ツールバーが消えたので、
次はWebViewでの3種類のボタン(次へ、戻る、更新)を用意します。
<RelativeLayout xmlns:android="http://schemas.android.com/apk/res/android"
xmlns:tools="http://schemas.android.com/tools"
android:layout_width="match_parent"
android:layout_height="match_parent"
....>
<RelativeLayout
android:id="@+id/top_layout"
android:layout_width="match_parent"
android:layout_height="?attr/actionBarSize"
android:layout_alignParentTop="true"
android:background="@android:color/white"
android:orientation="horizontal">
<Button
android:id="@+id/back_button"
android:layout_width="wrap_content"
android:layout_height="match_parent"
android:gravity="center"
android:text="戻る" />
<Button
android:id="@+id/forward_button"
android:layout_width="wrap_content"
android:layout_height="match_parent"
android:layout_toRightOf="@+id/back_button"
android:gravity="center"
android:text="次へ" />
<Button
android:id="@+id/update_button"
android:layout_width="wrap_content"
android:layout_height="match_parent"
android:layout_alignParentRight="true"
android:gravity="center"
android:text="更新" />
</RelativeLayout>
<WebView
android:id="@+id/webView"
android:layout_width="match_parent"
android:layout_height="match_parent"
android:layout_below="@+id/top_layout"
/>
</RelativeLayout>
MainActivity.java
次は、MainActivityに各ボタンの処理を書いていきます。
    private Button backButton;
    private Button forwardButton;
    private Button updateButton;

    @Override
    protected void onCreate(Bundle savedInstanceState) {
        super.onCreate(savedInstanceState);
        setContentView(R.layout.activity_main);

        webView = (WebView) findViewById(R.id.webView);

        //Web内のリンクをタップしたときなどに標準ブラウザを起動しないように設定
        webView.setWebViewClient(new WebViewClient());

        //jacascriptを許可する
        webView.getSettings().setJavaScriptEnabled(true);

        // Google表示
        webView.loadUrl("https://www.google.co.jp");


        backButton = (Button) findViewById(R.id.back_button);
        forwardButton = (Button) findViewById(R.id.forward_button);
        updateButton = (Button) findViewById(R.id.update_button);

        backButton.setOnClickListener(clickListener);
        forwardButton.setOnClickListener(clickListener);
        updateButton.setOnClickListener(clickListener);

    }


    private View.OnClickListener clickListener = new View.OnClickListener() {
        @Override
        public void onClick(View v) {
            if(v == backButton) {
                // 前のページに戻れるなら、前のページに戻る
                if(webView.canGoBack()) {
                    webView.goBack();
                }
            } else if(v == forwardButton) {
                // 次のページに進めるなら、次のページに進む
                if(webView.canGoForward()) {
                    webView.goForward();
                }
            } else if(v == updateButton) {
                // ページの更新
                webView.reload();
            }
        }
    };
・canGoBack()は前のページに戻れるかの判定を行います。
・goBack()は前のページに戻る処理です。
・canGoForwardは次のページに進めるかの判定を行います。
・goForward()は次のページに進む処理です。
・reload()はページの更新です。

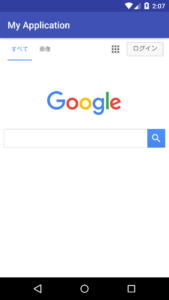
ツールバーもなくなっていますし、
ボタンも配置されていますね。
今回は、これで終わりです。