Firebaseでの通知処理を実装してみたので、
その方法です。
ちなみに通知ができるまでの最低限の処理です。
Firebaseをプロジェクトに入れる方法は、
過去記事のこちらを参照してください。
Android FireBase クラッシュレポートの導入方法
AndroidManifest.xml
通知を受け取るための前準備をここで書きます。
<manifest xmlns:android="http://schemas.android.com/apk/res/android">

    <application
        ....>
        <activity android:name=".MainActivity">
            ....
        </activity>

        <service android:name=".MyFirebaseMessagingService">
            <intent-filter>
                <action android:name="com.google.firebase.MESSAGING_EVENT" />
            </intent-filter>
        </service>

        <meta-data
            android:name="com.google.firebase.messaging.default_notification_icon"
            android:resource="@android:drawable/btn_star" />
        <meta-data
            android:name="com.google.firebase.messaging.default_notification_color"
            android:resource="@color/colorAccent" />

    </application>

</manifest>
MyFirebaseMessagingService.java
AndroidManifest.xmlで書いた
<service android:name=”.MyFirebaseMessagingService“>
の赤文字部分のクラスを作成します。
public class MyFirebaseMessagingService  extends FirebaseMessagingService {

    @Override
    public void onMessageReceived(RemoteMessage remoteMessage) {
        // 通知があれば、プッシュ通知を行う
      if (remoteMessage.getNotification() != null) {
            sendNotification(remoteMessage.getNotification().getBody());
        }

    }

   /**
     * プッシュ通知を送る処理
     */
    private void sendNotification(String messageBody) {
        //通知バーをクリックすれば、アプリが起動する
        Intent intent = new Intent(this, MainActivity.class);
        intent.addFlags(Intent.FLAG_ACTIVITY_CLEAR_TOP);
        PendingIntent pendingIntent =
            PendingIntent.getActivity(this, 0, intent,
                PendingIntent.FLAG_ONE_SHOT);

        // 通知バーの表示設定
        Uri defaultSoundUri=
            RingtoneManager.getDefaultUri(RingtoneManager.TYPE_NOTIFICATION);
        NotificationCompat.Builder notificationBuilder =
            new NotificationCompat.Builder(this)
                .setSmallIcon(R.drawable.ic_launcher_round)
                .setContentTitle("FireBaseTest")
                .setContentText(messageBody)
                .setAutoCancel(true)
                .setSound(defaultSoundUri)
                .setContentIntent(pendingIntent);

        NotificationManager notificationManager =
                (NotificationManager) getSystemService(Context.NOTIFICATION_SERVICE);

        notificationManager.notify(0, notificationBuilder.build());
    }
}
これでプログラムはできました。
続いてFirebaseから通知を送ります。

FirebaseConsoleのNotificationを開き、新しいメッセージをクリックします。
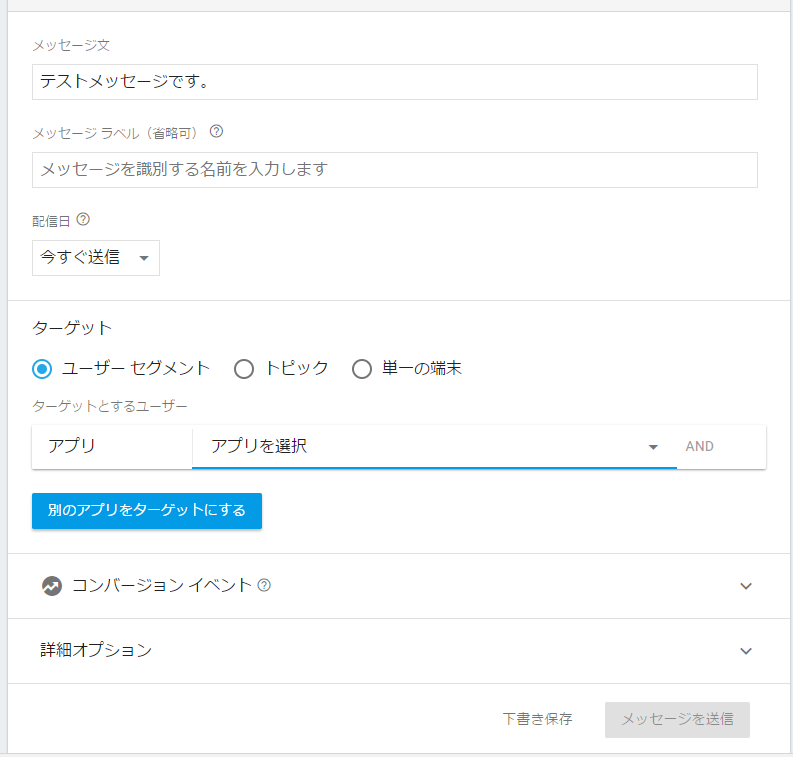
ここでは、メッセージ、配信日、ターゲットを入力します。
ターゲットをユーザーセグメントにすると、どのアプリに送るのか選択します。
入力後、メッセージ送信をクリックしてください。
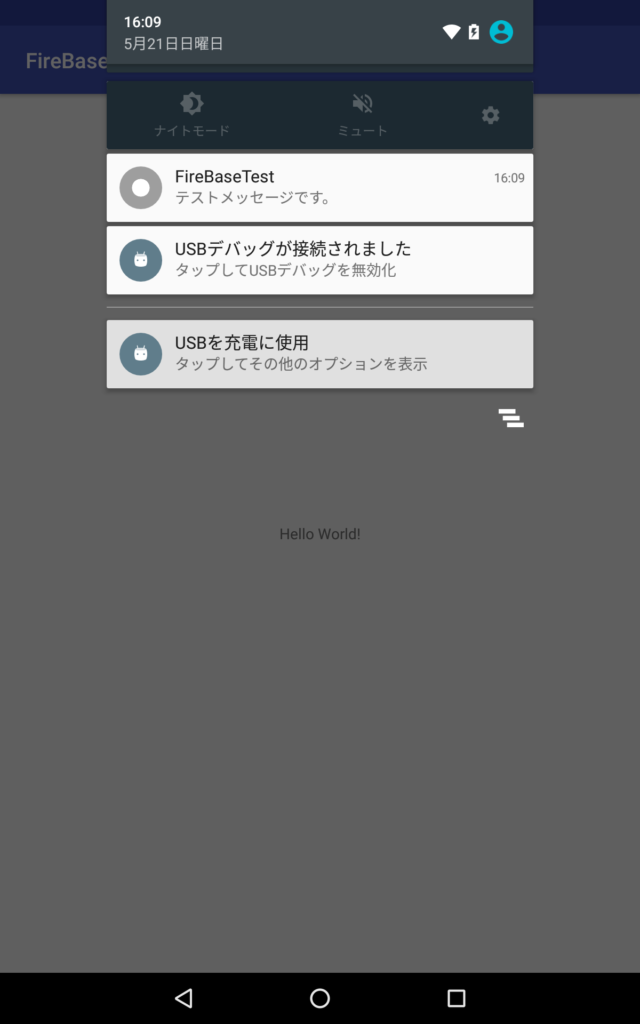
通知バーが出てますね。
以上です。
ブログランキングに参加中

プログラマーランキング